
One Room Challenge: Week 2 - Home Office
- Arianna Starnes

- Apr 13, 2022
- 2 min read
Updated: Aug 31, 2022
Let's Get to Work
It's week 2 of the ORC so we are breaking ground on the home office. Thankfully this room is completely blank so there's no demo that needs to be done, just moving and selling off the old furniture. Hello FB Marketplace! To get started we had to decide which wall we would put our row of built ins on. I always love the look of an office when you enter the room and see a grand executive desk and a feature point behind it. Here's a reminder of the before space and what the design is:


Planning + Prepping
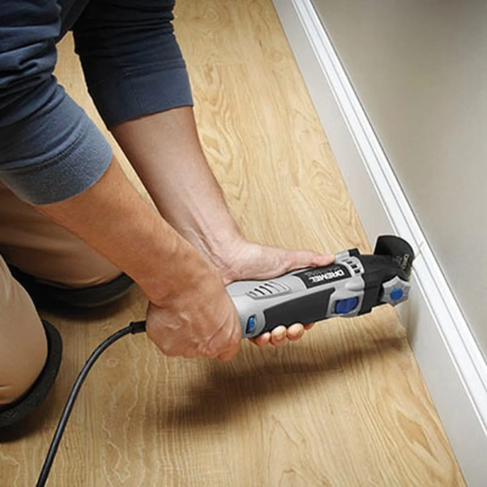
First we had to remove the existing baseboards. With a straight edge/exacto knife cut along the existing caulking. If you don't do this you will pull part of the wall off with your baseboards. Use a hammer to pry part of the baseboard off. If it's easier to remove in sections use a multi tool to cut the baseboard.


Now that we have a blank slate we need to built up the base/frame that the built ins are going to sit on. We are installing wall cabinets as our built in base to avoid having to build cabinets/doors.
We got these 4 unfinished wall cabinets from Lowe's for pretty cheap. A lot more inexpensive and timing saving then if we were to build our own. Before we got started I did a mock up of the built ins on Sketch-Up just to figure out size and how much space would be between each cabinet. I used the measurements of the cabinets and how much wall space we had to figure out the best placement since the cabinets don't fit perfectly and we would have some gaps.


Installation
Now, it's time to install the cabinets onto the base frame. Keep in mind we did not want the cabinets to be flush with the base, so we made the base a little smaller than the cabinet depth so they would hang over the edge. You can do this either way, just depends what look you are going for. We added spacers (the white trim) in between each cabinet to space them out evenly and fill the gaps.

This next part I needed reinforcements.. aka Dad. I knew I could try to do all of the shelving myself but this room is the first thing you see when you walk in the house, besides the entryway of course, so I wanted it to look really professional. (I have another project I am going to attempt this part of the built ins all by myself, so stay tuned) The shelves and siding we made out of plywood sheets and we used wood1x2s to trim the whole thing out.

We quickly realized that the walls in this house suck and nothing is perfectly square so we ended up having to add in back panels of wood because the gaps were too large to just use caulk. (Forgive me for the messy progress shots. It's hard to take pretty pics when you're in the middle of construction)

Join me next week to see how we added electrical hook ups to the top boxes and what wall sconces we chose!
(Visit the rest of the ORC's designers for this event: www.oneroomchallenge.com/orc-blog)


Can you give a bit more detail about your base frame, please? What dimensions and layout did you use? Thanks!